Fabric Button Initial Art

Happy Thursday! I’m still knee-deep working on my daughters closet makeover but I thought I would share a fun craft with you today that will be included in the reveal!  I save all the clothes that my kids have worn as babies up until about age 2 unless it’s something special that I would like to hang on to. Now what to do with all of those clothes!?!  This is a fun project that will help you cherish those little tiny baby memories forever in a way that can still be displayed and enjoyed! I can still remember the particular outfit that my baby was brought home from the hospital in or blessed in or wore for their first pictures so keeping these special memories alive is important to me!  Fabric Button Initial Art(using your babies clothes:

  Here is what you’ll need to re-create this gorgeous initial art:

Supplies:wood initial (found at craft store)button making kit (2 sizes)baby clotheshot glue gunframe (mine is 11 x 14)scrapbook paper  First, start by cutting out circles in your clothes. Follow the instructions on the cover button kit. I covered the cardboard in the frame with scrapbook paper and then hot glued the letter to that. Make sure to cut off any shanks on the backs of your buttons so that they lay flat 🙂 Hot glue your buttons to your letter and display! Easy as that and you have a unique piece of art that will be special for years to come!   And just so you’re not worried……I will use the cut up piece of clothing for a memory quilt so it will not go to waste 🙂 

Enjoy your art and have a beautiful day!

Distressed Yellow Dresser and How I Sand Furniture

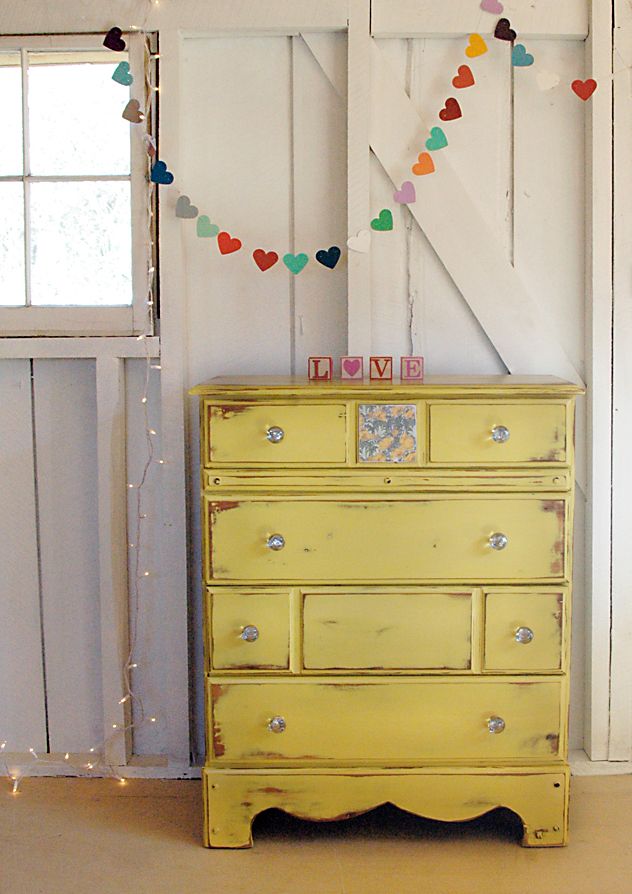
I thought I would share with you today my distressed and roughed up yellow dresser in my master bedroom that I’ve given you sneak peeks of in my post about how to create gallery walls

and also shown you here in my nursery inspiration post…….  

 I love the very pale yellow…..it totally compliments our rooms color scheme and helps to calm down all of the dark elements we have in our room. The paint is from Sherwin-Williams and I cannot tell you what the exact color is – only that I color matched it to a paint swatch I had that I now cannot find 🙁 What a crummy tutorial this is turning out to be, right? Anyhow, I will say that if you are painting furniture you’ll want to use a Sherwin-Williams paint (or something comparable) namely, the Pro Classic line. It will save you many a headache 🙂  I purposely didn’t prime this piece because I wanted as much original stain that I could get peeking out as possible. I applied two coats of paint and let it dry overnight.  Here is the FUN part:  

   My husband questioned me about distressing the dresser top the way I was going about doing it……let me first share a little secret with you……I LOVE to paint and stain but I HATE to sand!! Is anyone else with me?!? It’s hard work!! Sooooo being the lazy sander that I am I opted to ditch my sanding pad and pulled out my palm sander! 

 I started with the idea that I would just lightly distress the edges but as I started working with my palm sander to smooth out the top of my dresser it began pulling paint off in sections and was really loving how rough it started looking with entire sections sanded down to the original stain! (There’s also a huge section sanded down underneath my mirrored tray:)  I used the palm sander for the edges of the drawers and then had to get out a small piece of sandpaper to reach the corners and small spaces.

I wanted my sander to touch every corner and edge of the dresser and I accomplished the sanding process much faster than if using a sanding pad!  This piece would have been beautiful left alone but sanding it the way I did added so much more character!! What do you think?  Finally, I used a clear coat of Fiddes & Sons wax to seal and protect. 

 The knobs are all from Hobby Lobby. I wanted the top drawer to have chunkier knobs to create visual interest. Try mixing and matching your hardware –  I think you’ll love the result! Mix a funky pattern with a solid or a shiny gold with a muted pewter and you can even play with different sizes too!  As for the accessories, the candlestick and frame I’ve had forever. The bowl is from Tai Pan and the glass balls are from Michael’s. The aqua artichoke is from Marshall’s and the mirrored platter and white bowls are thrifted.  There you have it!! I hope you gleaned a bit of knowledge from my uncommon refinishing process 🙂 

Organizing Kids Schoolwork

I’m sure that you are well aware, if you have kiddos that are in school or have ever gone to school, the crazy amount of projects, graded homework, and art is brought home everyday!! It’s a lot and the problem is it can add up very quickly!

I wanted to share with you how I organize with my ‘yearbook’ system. It’s really nothing fancy but it works for me……and maybe it will work for you too 🙂

So let’s start with the day-to-day stuff that comes home. I make sure to go through backpacks and folders for work brought home and sort it that evening. Most graded homework is put in the recycling bin unless it is something special I want to hang on to. For instance, a perfect spelling test or a paper with their name written really well (I do save random assignments throughout the year to document how their handwriting has improved…….I have little ones so that’s important:)

Other things I keep:most creative writing art workbook reports projects

Everything that I keep is dated and sometimes an explanation for why I’m keeping it (it made me laugh/cry or made me proud OR it was something my child was proud of)

I bought these journaling stamps for this purpose! You, of course, don’t need to run out and purchase a new set of stamps. For me, it made it more fun to record my memory!

Once I’ve dated what I’m keeping (and I don’t always write a paragraph on each paper:)it goes here:

I dedicate an entire drawer to schoolwork beacause like I said it does add up quickly and I want it out of sight until I’m ready to go through it.

At the end of the school year after every last item is collected I go through my drawer and I sort again. I sometimes find that I in fact kept 30 spelling tests when really I could probably do with 4 or 5! There’s always an overload of artwork when their little so if it’s not something that really strikes a chord with me or it’s something that they worked really hard on I get rid of it!

Oftentimes I involve my kids in this process and ask them of the items I’m willing to get rid of which ones would they like to hold on to. That way it’s special for them too!

Now onto the year end folder! I found the largest 3-ring binder I could and embellished the front (this one is back in my scrapbook days)

and labeled the spine with the school years it contains

I organize each school year with a cover sheet I created. You are more than welcome to use it if yu think it will help you 🙂 Simply right click, click ‘save picture as’, save to your hardrive and print!

I like to include a photo of their first day of school! Any additional photos I’ve taken throughout the year I put into photo pockets right behind the cover page.

And there you have it…….a organized ‘yearbook’ school folder!

I hope that this helps in your attempt to tackle that school work pile and easily organize them so they can actually be enjoyed!

Have fun with it! Good Luck!


Best Fall Cookie: Pumpkin Spice with Raspberry

Yesterday I asked you on my Facebook page what your go to cookie recipe was for Fall!   This is mine!

   Actually, this is my go-to cookie recipe for any time of the year 🙂 And you know why……..it’s SO easy! I keep the ingredients in my pantry at all times so I can simply throw this together at a moment’s notice! And the topping is unexpected……you don’t normally think of raspberries with pumpkin but it works, I assure you it works and they are SO yummy! They are simple enough for a weeknight dessert and fancy enough for a party!

Here are the three, yes just THREE ingredients for the cookies:

1 can of pumpkin
box of spice cake mix
1/2 bag of mini chocolate chips

Mix these together until well blended. Spoon size amount on a parchment-lined baking sheet. Bake 14 minutes at 375 degrees. So easy!

Though they are fantastic by themselves (in addition to making the house smell like sooooooo goooood!) I thought to make them extra special in case I’m taking them to a party I would add fun topping to them! 

Here is what you’ll need:

maraschino cherry juice (about 1 tbls.)vanilla frosting raspberries Simply add the cherry juice to your frosting and mix well. Frost your cookies and finish them with a raspberry! I told you they were the easiest cookies ever!  Did I mention they are also kid-approved 🙂  

So what is your favorite cookie for Fall?

Important to clean your hands and your kitchen before and after you cook. Your kitchen utensils, equipment, and hood including your grease trap if you have. You can also let grease trap clean from a pro. Grease trap cleaning Indianapolis can help you with it.

Have you entered the Shabby Apple Giveaway!?! You can enter HERE!

Handmade 101: Chunky Bead Knotted Necklace

{Chunky Bead Knotted Necklace}  


This is a super easy fun little necklace that will take you less than 30 minutes and will be a perfect colorful summertime accessory 🙂 Yay for fast, easy and cute!

First thing is you’ll need to do is gather your supplies. The beads were ordered online here and I chose a coordinating ribbon that was 3/8″wide and 1 yd. long.  Anything wider might be a tad difficult to get through the bead holes (just an f.y.i.:) 

 Next, tape off each end of your ribbon. Fold it once and then again and put a piece of tape around it. Thread your first bead. I started beading using the center bead and working out from there.

 After you have your first bead centered on your ribbon tie a knot on either side of it.

 I found it helpful to use a straight pin to help the ribbon through the bead holes.

Continue threading your beads in between knots until you are satisfied with your adorable necklace. Remove the tape from the ribbon ends.

Tie in a knot to secure around neck and ENJOY!!

Make it a beautiful day 🙂

Aqua and Yellow Fall Tablescape

I’ve been loving looking at all of the gorgeous Fall tablescapes all over Pinterest and other blogs!! I dream of hosting a lovely party with a beautiful tablescape where everyone has a name card and uses a cloth napkin 🙂 It’s never happened yet but a girl can dream, right!

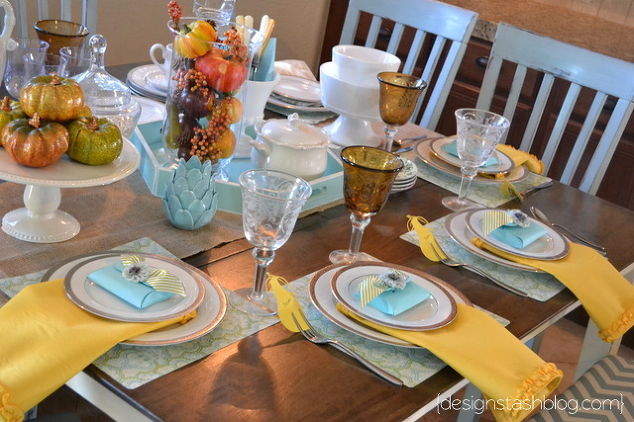
Anyhow, most of the pictures that I found although beautiful had your traditional Fall colors……orange, yellow, brown, cream…..so I decided to throw a little color in my Fall tablescape – namely my fave aqua and yellow!!

I love how the aqua blends so well with my newly painted chairs and how the yellow pops! I also moved my chevron striped bench that I recovered into the mix.

I’m sorta obsessed with white plates, serveware, and accessories {because one day I WILL have an all white kitchen! :} and collecting napkins, placemats and tableclothes for whatever reason…..I never host fancy parties but I do seem to use them occasionally for casual get togethers. So everything pictured is something I already had!

I also shopped my home for the aqua accessories……..AND I did throw in some traditional Fall colors 🙂 I think it works, do you

The placemats are simply 12 x 12 pieces of patterned paper. I used my Silhouette to make the favor boxes and pear place cards.

Have a wonderful Fall season decorating for your get togethers be it fancy or casual or something in between! And don’t be afraid to add a little color!!

Back to School Scavenger Hunt!

My boys start school on Monday!! Wow, did the summer zoom by! In the past we have always gone school supply shopping together which is just oh so fun……not really 🙂 Taking three kiddos into a store where about three-quarters of its customers are jammed into about 4 aisles is simply put, mad chaos!

I decided to do things a bit differently this year. Skip the rush and just do it by myself 🙂 Problem solved! There’s something about fresh crayons, clean crisp folders and sharp scissors that is just so exciting so I thought it really didn’t matter that they were actually present when choosing them. Let’s change things up a bit and make it fun so I put together a little hunt!

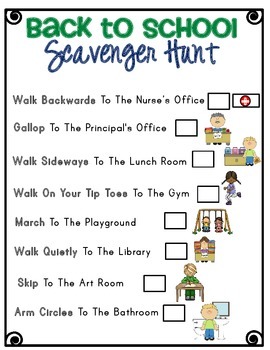
‘Back to School Scavenger Hunt’

Other than the supplies purchased this is a cheap and easy way to get your kids excited about the new school year!
Here are the supplies you’ll need:
bags with handles for each school-going childscrapbook paperlollipop sticksapplesschool suppliestreats for the end prize

I used gridded paper to cut an apple using my Silhouette and labeled it with my boys names. I mounted the apple on a square of scraphook paper and a clothespin to secure it to the bag. Use any bag you have on hand for them to collect their school goodies in……a plastic grocery sack works too 🙂 

Next, I used my Silhouette again to cut flag templates…..they will be used for the clues! Glue the flags on lollipop sticks or popsicle sticks and stick them in the red apples. You can use any clues you would like. I used locations in our home for the clues. Here are mine as an example:

‘books’ of knowledge (aka book collection)
‘seeds’ of knowledge  (garden spot)
clean school clothes (laundry room)
‘Wii’ relax and play (playroom)
carpool (our beloved minivan)
homework zone (kitchen table)

I hope that this is a fun alternative to the shopping-for-school-supplies fiasco! Let me know how it goes for you and your school bound kids 🙂

If you are looking for more school ideas I have documented here how to manageably organize and enjoy all of the schoolwork, art and projects brought home from school!

Make it a beautiful day!

Pretty Projects No. 3: Tattered Vintage Book Stack


As I promised in my living room post here is a tutorial on how I created my Vintage Book Stack

{Tattered Vintage Book Stack}

I took a quick shopping trip to Goodwill to find some old books……the older and more beat up the better 🙂 I chose books similar in width and also looked for yellowing pages…..that will add to the vintage charm!

Remove book covers…..

You can peel back as much or as little of the binding as you’d like. The more you peel off the shabbier your books will look 🙂

This is the look I ended up with…..


Continue the same process with the other two books.

Next, you’ll need to gather your supplies. I grabbed some stamps and a brown stamp pad I had on hand, some embellishments like the vintage bookplate and some lace and twine. Feel free to use what you currently have.

Using your stamps or whatever you’ve decided to use begin embellishing the spines of your books.

Add your other embellishments with hot glue.

I flipped the top book over to the backside so I would have a blank page that I could use my larger vintage words stamp on and then I covered that with a thick burlap type ribbon that I had in my stash. Finally wrap your book stack like a gift with the twine.


And there you go….a gorgeous very vintage book stack to add to your decor, to use at a wedding or vintage party or shower, whatever you’d like! Hope you love it and as always make it a beautiful day!


Pretty Projects No. 5: Clothesline Frame with Mini Pennant

Different than your common clothesline frame I decided to add a bit more flair to it with my ‘little ones’ mini pennant:

This frame was originally gold then painted white and then finally spray-painted yellow. I used small eye hooks, picture wire and pliers.

 I screwed the hooks into the frame starting one-third of the way down because I knew that I wanted three ‘lines’ of photos. The second pair of screws went in halfway down and the third pair one-third of the way up from the bottom. Simply create a starting point and continue twisting and finish with the pliers until they are secure.

Next, thread the wire through the hook on one side and use the pliers to wrap it tightly and then thread through the corresponding side. I left my wire a bit loose across because I knew I wanted it to not look perfect, if you know what I mean 🙂

Simple as that! Now you can use any size clothespin you would like to hang your photos or postcards or whatever you plan to hang on your picture wire.

Now onto the mini pennant banner!!
Here are the supplies you will need: I printed ‘Little Ones’ out using my printer. The scalloped circle and mini flags were cut using my Silhouette. You can easily cut a thin rectangle out of scrapbook paper and clip the edges to resemble the little flags!

The rest is super simple! I folded the flags in half over the twine and glued them closed. I used my stamp pad to distress the edges of my mini flags and ‘Little Ones’ cutout.

Now using your clothespins clip your mini pennant banner to your picture wire on your frame. And your done…….ready to hang!

This creation went perfectly in our Master bedroom with the yellow accents and sweet pictures of our kiddos – it’s fun waking up to their beautiful ‘little’ faces 🙂

Make it a beautiful day 🙂

TDC Before and After
Bookmark and Share

Simple Typography Print Tutorial


I finished my family room gallery wall about a week ago but I still hadn’t found the perfect something to put into a frame with awkward dimensions – 5 3/4 x 11 3/4 – what is that? I contemplated getting a picture enlarged and cropping to fit the frame or framing a piece of patterned paper to compliment my color scheme…..hmmmm……Then while toodling around on Pic Monkey I decided I would make my own very simple typography print! I knew I wanted a black type on white look so I googled ‘white paper’ and clicked ‘Images’ and saved a piece of white ‘paper’ to my computer. You can use any color background you would like……simply google that color and save the image to your computer. 

Next, in Pic Monkey open the white paper file you saved. Here you will resize to fit the dimensions you would like. My funky dimensions in pixels was 431 x 881. If you would like to create a print to fit in an 8 x 10 frame you would want 600 x 750 in pixels. I used this handy calculator to convert my measurement from inches to pixels. Click ‘Resize’ and enter your dimensions. Be sure to unclick ‘keep proportions’ and then click ‘apply.’ 

 Now you get to enter your text! On the far left hand side click the icon that looks like a ‘P’, then ‘Add Text.’ You can play around with your font, color and sizing until you have a look you love. I didn’t get into all of the fun features and effects but I did add a little asterick for kicks. You can do the same by clicking the ‘Overlays’ icon, again located on the far left side. I chose ‘Stars’ and sized my shape for my print. Frame, hang and enjoy 🙂 

 I’ll share my gallery walll later on this week but here’s a little sneak-peak! 

 I hope you enjoy the tutorial! Have you used Pic Monkey to create your own print? I’m always learning and would love any tips or tricks you’ve learned!xoxo,