Distressed Yellow Dresser and How I Sand Furniture

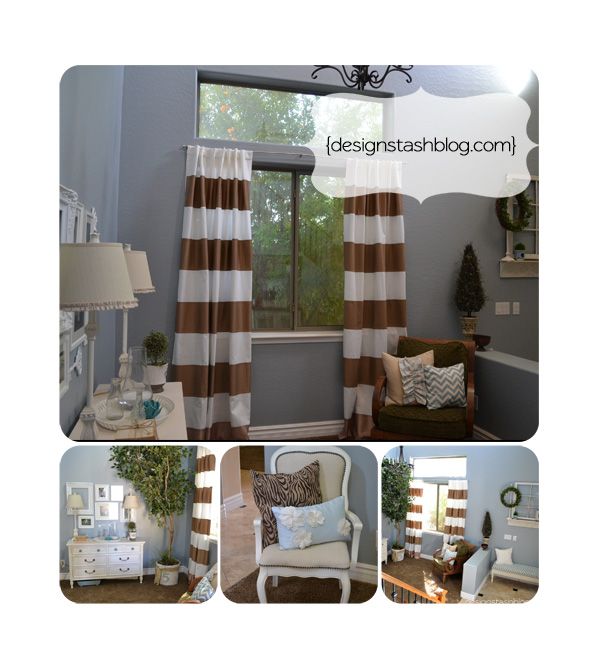
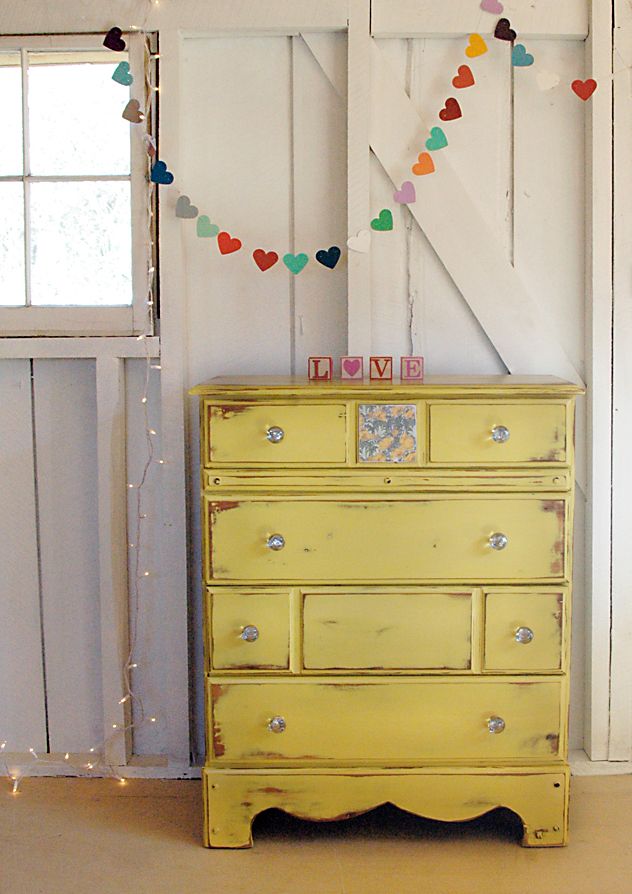
I thought I would share with you today my distressed and roughed up yellow dresser in my master bedroom that I’ve given you sneak peeks of in my post about how to create gallery walls

and also shown you here in my nursery inspiration post…….  

 I love the very pale yellow…..it totally compliments our rooms color scheme and helps to calm down all of the dark elements we have in our room. The paint is from Sherwin-Williams and I cannot tell you what the exact color is – only that I color matched it to a paint swatch I had that I now cannot find 🙁 What a crummy tutorial this is turning out to be, right? Anyhow, I will say that if you are painting furniture you’ll want to use a Sherwin-Williams paint (or something comparable) namely, the Pro Classic line. It will save you many a headache 🙂  I purposely didn’t prime this piece because I wanted as much original stain that I could get peeking out as possible. I applied two coats of paint and let it dry overnight.  Here is the FUN part:  

   My husband questioned me about distressing the dresser top the way I was going about doing it……let me first share a little secret with you……I LOVE to paint and stain but I HATE to sand!! Is anyone else with me?!? It’s hard work!! Sooooo being the lazy sander that I am I opted to ditch my sanding pad and pulled out my palm sander! 

 I started with the idea that I would just lightly distress the edges but as I started working with my palm sander to smooth out the top of my dresser it began pulling paint off in sections and was really loving how rough it started looking with entire sections sanded down to the original stain! (There’s also a huge section sanded down underneath my mirrored tray:)  I used the palm sander for the edges of the drawers and then had to get out a small piece of sandpaper to reach the corners and small spaces.

I wanted my sander to touch every corner and edge of the dresser and I accomplished the sanding process much faster than if using a sanding pad!  This piece would have been beautiful left alone but sanding it the way I did added so much more character!! What do you think?  Finally, I used a clear coat of Fiddes & Sons wax to seal and protect. 

 The knobs are all from Hobby Lobby. I wanted the top drawer to have chunkier knobs to create visual interest. Try mixing and matching your hardware –  I think you’ll love the result! Mix a funky pattern with a solid or a shiny gold with a muted pewter and you can even play with different sizes too!  As for the accessories, the candlestick and frame I’ve had forever. The bowl is from Tai Pan and the glass balls are from Michael’s. The aqua artichoke is from Marshall’s and the mirrored platter and white bowls are thrifted.  There you have it!! I hope you gleaned a bit of knowledge from my uncommon refinishing process 🙂 

Inspiration: Stripes……and how I changed the feel of my Living Room

I have to start this post by saying YES, I know everyone and their dog has used stripes in some shape or form in their home by now. But, is it really trendy or just remanifesting itself as a classic making a comeback? You can agree or disagree with me but I believe stripes are a classic and always will be 🙂 I LOVE stripes…….in home design and fashion alike. 

Aaaaaaand, I just HAD to show off my gorgeous brown/white striped curtains I finally hung in my living room.
See this is what I was working with before:

I sorta throw up in my mouth a little when I see the gold walls and heavy green and gold curtains……not to mention the ugly leather club chair…..oh dear, what on earth was I thinking!?! Since this is an inspiration post, I took to heart what The Nester had to say about changing the feel of a room………so I decided to simply take down the green/gold curtains that had hung on my wall for 5 years and that I paid a ridiculous amount of moola for (fabric + seamstress….this was back when I didn’t sew) and the room felt quiet. I left it like that for a few weeks to see if I continued to have the giant-brick-sitting-on-my-chest-was-now-gone-feeling. And it was. And it stayed. I also decided to install a new air conditioning Maui.

Here is the {lovely} and refreshing change:

and yes, I know the green chair doesn’t exactly fit in the mix……it will be recovered very soon with something a little more neutral. My rooms light bulb is installed by 
an electrical repair and installation services company. Their expert electrician 
can provide you ultimate repair solutions. But do you see where I’m going with this?

Who says you need to keep something because you paid a ton of money for it or you’ve had it forever and it means something now or it was a gift or you can’t afford anything else. I dispelled most of the above reasons by justifying that I DID enjoy the ridiculously expensive curtains for a whole 5 years, I picked out the fabric (yes, I admit it:) so I had only myself to blame, I wasn’t hanging on to them to please anyone, and I knew I could makeover the space for half or even a quarter of the money I had spent. And if that wasn’t enough I felt like I was suffocating every time I walked through that dark room…….who wants to feel like that in their own home. I also called stucco San Jose to repair cracks and holes in my room.

So, back to the stripes……I knew I wanted something different, pattern-wise and something that would draw the eye to the light in the room (aka: my huge double windows) and I was completely smitten with the thought of a horizontal stripe……like this one here…..

source
The black and white ended up being more than the room could handle so as I was blog-stalking one night I found this:

I thought ~ perfect ~ subtle but still makes an impact! I purchased my panels from IKEA for $24.99 and found 3 yards of brown fabric at Wal-mart for $2.49/yd. There is a very detailed tutorial that I did loosely follow to make my curtains. And wa-la!! a new look! Well, not completely…..I did paint the room and furniture and changed up the accessories to reflect a more neutral feel {I will go into more of the transformation later on, trust :}

So, back to my little piece of inspiration…..what started as a thought, an idea, an inkling turned into actual execution and a completely different perspective……one that I truly enjoy!

Here are a few more bits of ‘stripey’ inspiration……

Oh the places we could go…….

Or how’s this for an attention grabber…..love these colors too 🙂

And lastly, an ensemble that inspires me everyday……it doesn’t always have to match, right?

What has inspired change in you or your home lately? Do share 🙂

When our home is exposed to damage from water leaks or major floods, we always call RapidDRY Kailua a water damage company and they will do their best to restore and renovate your property.

A Shelf Turned Bench Story

This piece has literally been sitting in my garage for over a year now! I knew that I didn’t want to use it as a shelf and then the thought came…….what about a bench!! Simply remove the top shelf and repurpose it as the back to my bench…….brilliant!! 🙂
Here is the before……

Confession: I get way more excited over paint colors than the actual taking-apart-drilling-back-together process! What about you? I guess I’m more of a paint enthusiast at heart than a DIY-er 🙂


I had a vision of how I wanted the end result to look…….a blue-green-gray was dancing in my head! In the end I took the easy way out……grabbed a can of paint in my closet used to paint our master bedroom: Light French Gray by Behr which happens to be a really beautiful light blue-gray and went to town!
But first, the reconstruction……

We installed two large L-brackets to stablize the bottom ‘shelf’ since this would actually be the portion that people would sit on!

We then unscrewed the top ‘shelf’ and placed it flush against the back and secured it with mending plates.

Next comes the paint!!!!

I was turning out exactly as I’d pictured after a light distressing. I then used some silver Rub ‘n Buff for the metalwork on each end.

Lastly, I sealed it with a coat of Fiddes & Sons clear wax. Smelly stuff but definitely is the easiest wax to work with:)

I can’t stand how much I’m loving this piece!! I’m picturing it in our new home (yes, we may be moving in the near future) in the entryway as a place for guests to sit and take off their shoes. In my perfect world everyone would remove their shoes before coming in our home……..I can dream right!?!

Here are some final pictures I snagged……

I think I’ll save this beauty for my someday-gorgeous-and-dramatic entryway! Until then…….

What’s your favorite piece of furniture right now?

Make it a beautiful day 🙂

If you don’t have time to make over or remodel your furniture or other items in your home, home remodeling spring hill can help you renovate your house like mine.


Fabric Covered Closet Dowels

My daughter turned 3 yesterday!!!! In an effort to make her room more of a big girl space I’ve been working on her closet to include a dollhouse and dress up area. I’ll have a full reveal very soon but for now I wanted to share an easy tutorial that can make a huge impact in a closet space! It can be done to any closet to dress it up a bit and add some color and personality!

Fabric Covered Closet Dowels {Tutorial} 

I failed to take a before picture of this closet, however, I know everyone of you has a closet with manufacturer grade bare wood closet dowels in it so you can just imagine how non-cute it looked 🙂  I had three dowels 35″ in length and 4.5″ in diameter. I chose 1 yard of a pretty fabric from my ‘girly-stash’ that complimented the new aqua colored closet and the rest of the pinkish room.

 You’ll want to measure the diameter of your dowels and add 1″ to that for the width of the pieces you will cut. I folded the yard in half to cut two pieces at a time and ended up with 6 pieces.

  Next, you’ll double the length of your dowel and that is how long you will need your fabric piece to be. I accomplished this by sewing two pieces together to create a length of 70″. Remember to sew the pieces with right side facing right side 🙂


Still with right sides facing each other, fold your piece in half lenghwise and sew with a 1/2″ seam allowance.

  The next step will probably take you the most time but well worth it! You’ll need to turn your sewn piece inside out! Just go a bit at a time……I found using a butter knife helped by pushing the fabric through. Just don’t push too hard you won’t want to rip your seams.

 This is what your finished pieces will look like…… 


Now slide your fabric pieces onto your plain closet dowels. I used a hot glue gun to secure the ends by folding as if I was folding the end of a present.

 Now it’s time to hang your new fabric covered closet dowels!! You know I didn’t hang them back up on the cheap fake brass looking hangers did you?!? They got a fresh coat of aqua spray paint.

I also called bed bug services to inspect her room and the whole house to exterminate the bed bugs and other insects inside of our house.

 Stand back and admire your work! I think they really added some fun colorful character to the closet space!

Stay tuned for some other fun projects and tutorials used to transform this closet area soon!! I can’t wait for you to see how it finally turns out 🙂

DIY Wreath Hanger

Like many of you I see possibilities from……well, trash! My mom bought a new kitchen table and was getting rid of her old and worn-out one. Guess who took it home…….yep, me 🙂 I will be using the table in my den/craft room but I really didn’t need or have the space for 4 extra chairs. In my garage they sat until I brought one inside and started taking it apart. Then the thought struck! I was going to use the spindled legs to make my own wreath hangers.

I also make a lot of banners so these would come in handy! I even have a Pinterest board dedicated to just banners/bunting/pennants!! LOVE them!

Cute right?!? Here are the supplies you’ll need to make you own wreath hanger:

I found most of the supplies at my hardware store except the hook which was purchased at Hobby Lobby. This project is cheap too……..if you don’t have any old chairs to steal a leg from you can always buy them! The unfinished finials were $1.22 for two, the molding was $1.99 and the hooks were $2.50 (on sale)

Start by screwing your molding into the base of your chair leg to create a stable base.

Next drill a hole for where you will screw your finials in.

Mark your chair leg where you would like your hook to be, drill pilot holes and screw into place.

Finished (unfinished) wreath/banner hangers:

I used Kilz Primer and Valspar White Gloss.

And ta-da!!

I also want to resurface our deck as you can see it looks old and I want it to look new. My friend recommends deck resurfacing to me because they will surely make our deck look new again.

Front Porch Fall Decor

Here is just a sneak peek of the Fall decorating that is going on around my home! The front porch and entryway are my favorite parts to decorate because it really sets the tone for the rest of my house!

 I am currently LOVING aqua in my Fall decorating so you know I just had to include some in my outdoor decor 🙂 

The aqua ‘tray’ is perfect for holding my pumpkin collection along with a rustic ‘Pumpkins’ sign that I made. The blue chevron striped pillow and the plant stand is another way I tied it all together.

I just finished up the first of a pair of folding chairs I thrifted a while back and I thought why not use it to hold my Fall goodies. The fabric compliments the orange tones in my pumpkins and sign.

I also hired a concrete contractor to build concrete stairs to our front porch. 

What Fall decorating have you done lately? What is your favorite area to decorate? I hope you enjoyed my Fall front porch and stay tuned for more Fall themed decor, crafts and ideas! 🙂