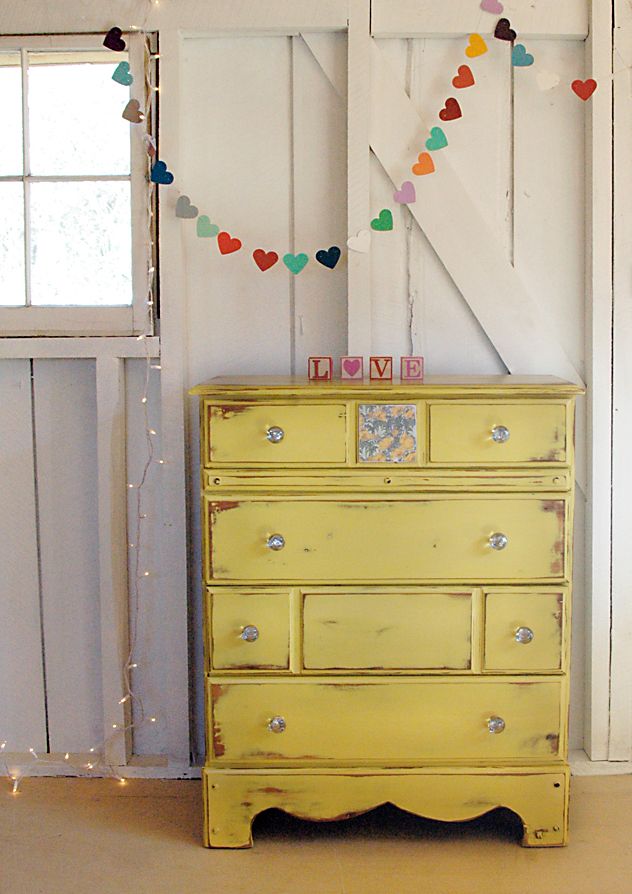
I thought I would share with you today my distressed and roughed up yellow dresser in my master bedroom that I’ve given you sneak peeks of in my post about how to create gallery walls

and also shown you here in my nursery inspiration post…….
I love the very pale yellow…..it totally compliments our rooms color scheme and helps to calm down all of the dark elements we have in our room. The paint is from Sherwin-Williams and I cannot tell you what the exact color is – only that I color matched it to a paint swatch I had that I now cannot find 🙁 What a crummy tutorial this is turning out to be, right? Anyhow, I will say that if you are painting furniture you’ll want to use a Sherwin-Williams paint (or something comparable) namely, the Pro Classic line. It will save you many a headache 🙂 I purposely didn’t prime this piece because I wanted as much original stain that I could get peeking out as possible. I applied two coats of paint and let it dry overnight. Here is the FUN part:
My husband questioned me about distressing the dresser top the way I was going about doing it……let me first share a little secret with you……I LOVE to paint and stain but I HATE to sand!! Is anyone else with me?!? It’s hard work!! Sooooo being the lazy sander that I am I opted to ditch my sanding pad and pulled out my palm sander!
I started with the idea that I would just lightly distress the edges but as I started working with my palm sander to smooth out the top of my dresser it began pulling paint off in sections and was really loving how rough it started looking with entire sections sanded down to the original stain! (There’s also a huge section sanded down underneath my mirrored tray:) I used the palm sander for the edges of the drawers and then had to get out a small piece of sandpaper to reach the corners and small spaces.
I wanted my sander to touch every corner and edge of the dresser and I accomplished the sanding process much faster than if using a sanding pad! This piece would have been beautiful left alone but sanding it the way I did added so much more character!! What do you think? Finally, I used a clear coat of Fiddes & Sons wax to seal and protect.
The knobs are all from Hobby Lobby. I wanted the top drawer to have chunkier knobs to create visual interest. Try mixing and matching your hardware – I think you’ll love the result! Mix a funky pattern with a solid or a shiny gold with a muted pewter and you can even play with different sizes too! As for the accessories, the candlestick and frame I’ve had forever. The bowl is from Tai Pan and the glass balls are from Michael’s. The aqua artichoke is from Marshall’s and the mirrored platter and white bowls are thrifted. There you have it!! I hope you gleaned a bit of knowledge from my uncommon refinishing process 🙂